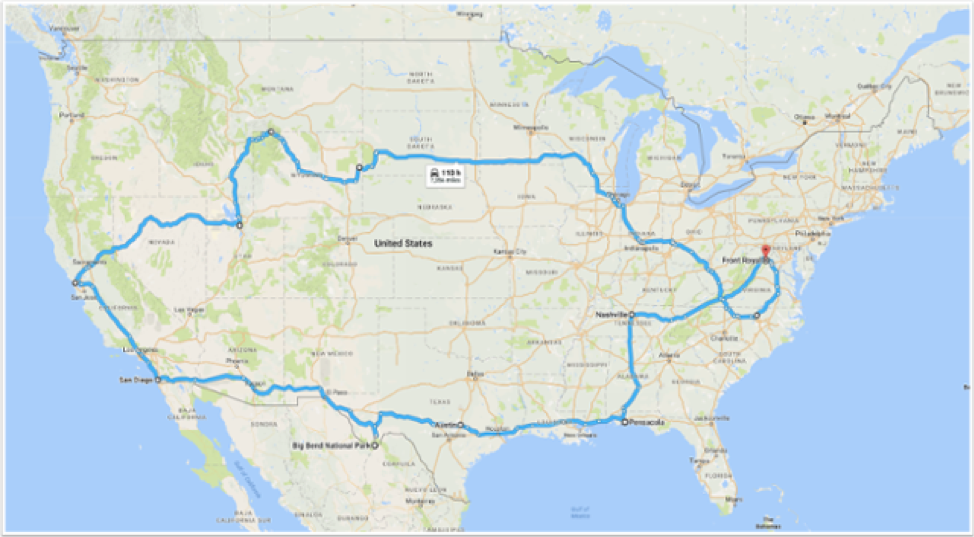
[SCENE] You’re a remote worker who’s traveling full time in your RV. You're chasing a mobile hotspot connection as you travel across America in search of the next magical national park.
You’ve learned a lot through your journey, and want to share your experience and insights with the rest of the world. You dream about creating memorable videos that tell your story in a practical, helpful way. But coming up with video ideas to capture your experience isn’t the problem; it’s building the confidence and skills to do so that holds you back. You’re letting that story go unheard, and that’s a shame.
Let’s get real for a moment: Creating your first video can be a scary task that intimidates most. But it doesn’t have to be if you approach it with the right mindset and intention.
If you’re new or just getting started with creating video content, it can be a real challenge to create something you’re proud of, especially if you’re comparing yourself to others who have been doing it for years.
But today, you’re here because you want to cast that fear aside. Your intention is to overcome your doubt and start creating meaningful videos that attract and engage your audience. Yes, learning this new skill will challenge you, but the trick to creating effective video content is getting started and constantly looking for ways to grow and improve your skill set and process. The more you practice something, the more it becomes a habit. Be positive and continuously look for ways to motivate yourself.
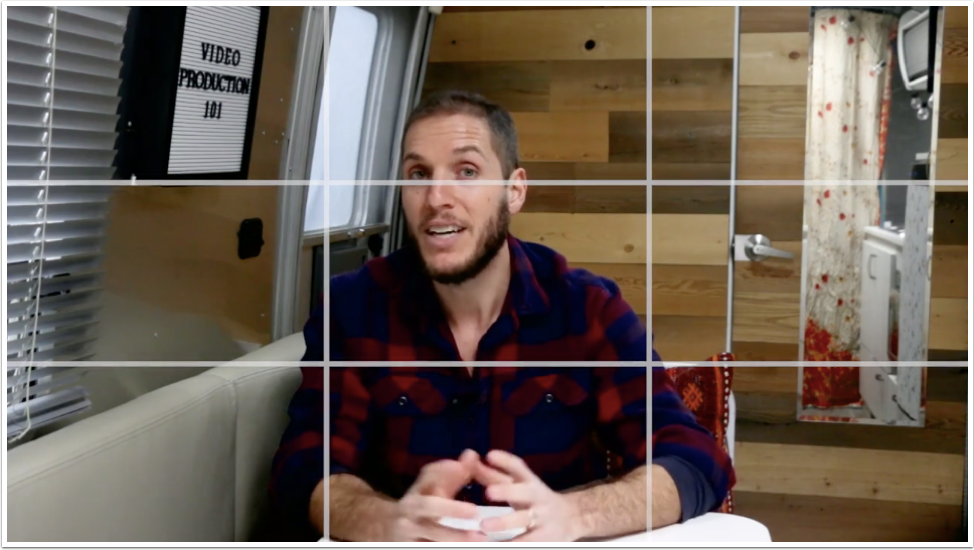
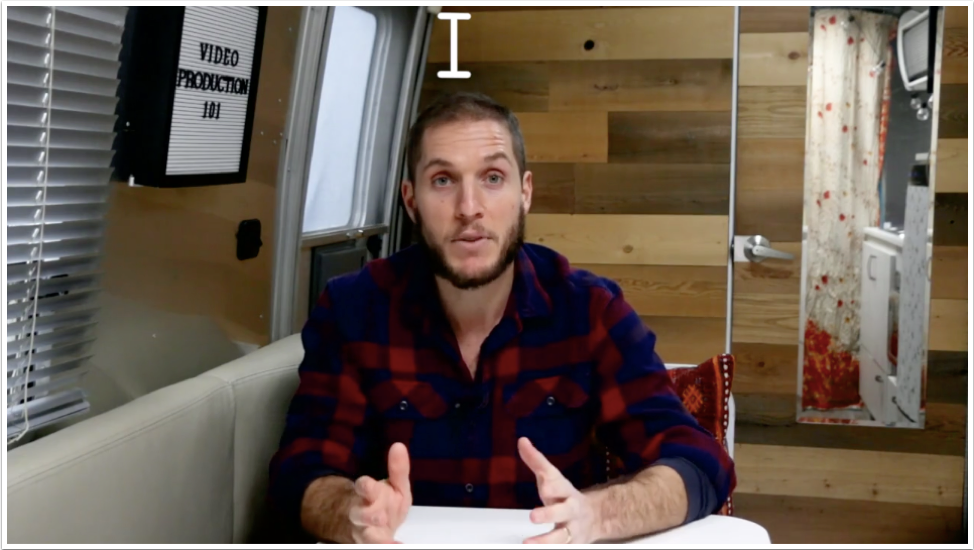
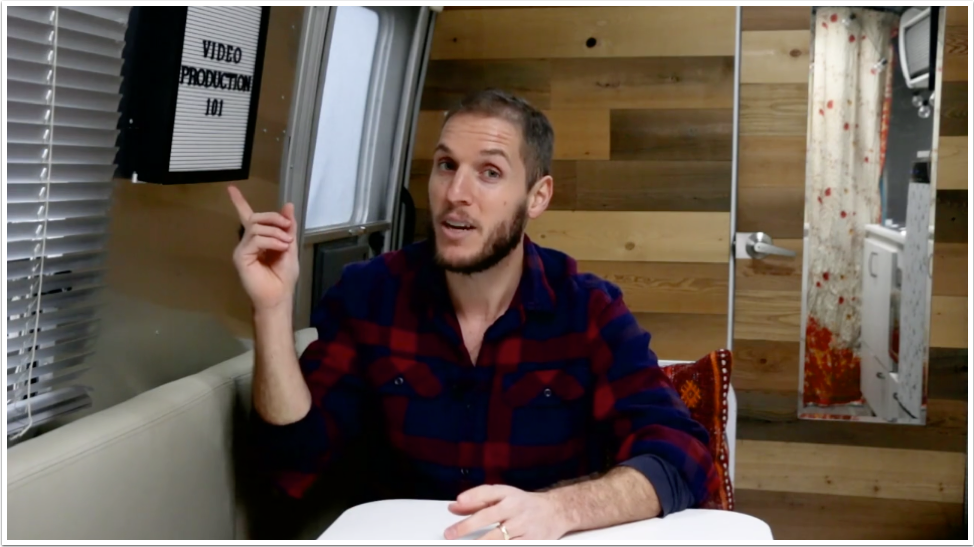
I’m going to break down the video production process for you in eight easy-to-understand steps. If you’re a visual learner like me, then you can watch the expanded version of this article in a free Online Video Marketing Course I created with HubSpot Academy. I recorded lesson three — Video Production 101 —from my Airstream Bambi Sport.

Before diving in, watch the video below, then we’ll review how we produced it. (I created this with the help of my talented video producer friend, and fellow wanderer, Jesse Abbruzzese).
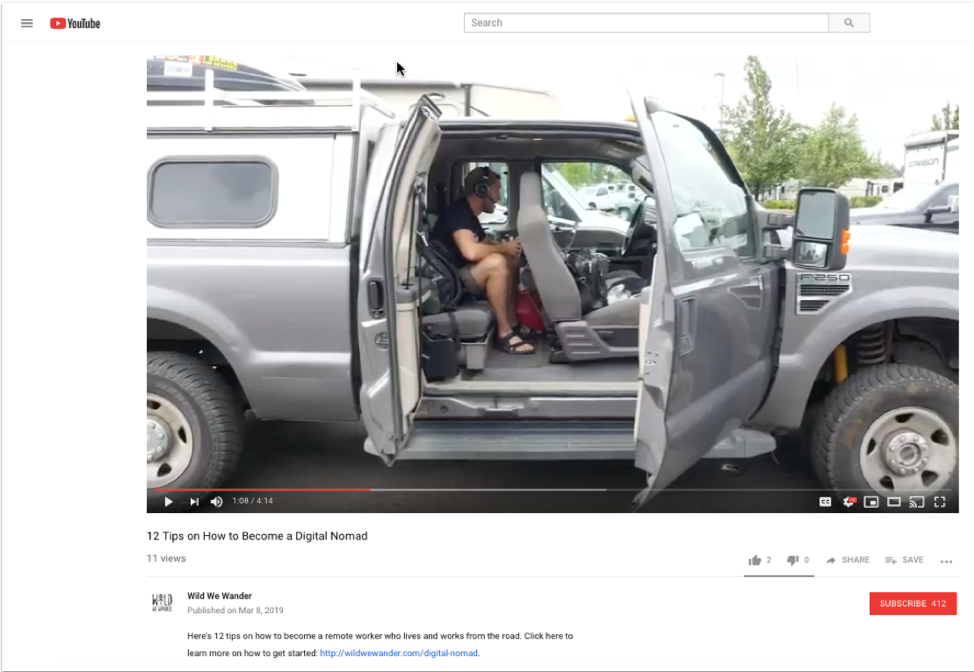
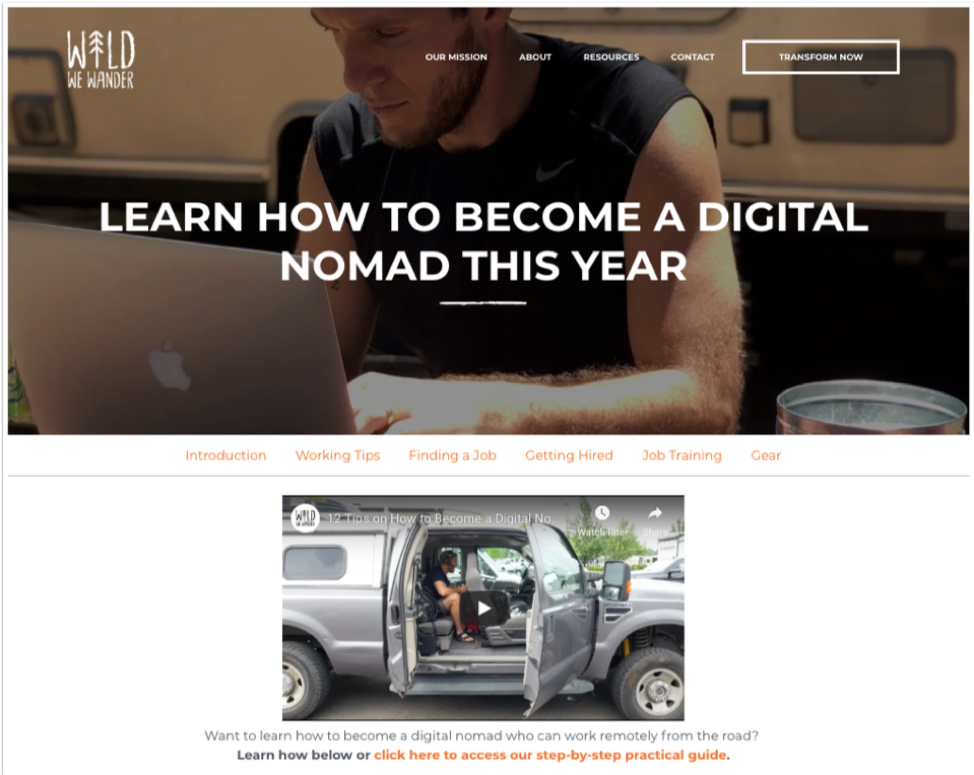
Want to learn how to become a digital nomad? Click here to learn how step-by-step for free.
9 steps to creating a professional video:
Pre-production is a crucial part of making an effective and efficient video. During pre-production the focus is on planning and coordination. Without proper planning, you may overlook something you need to produce a memorable video, or you could find yourself missing content you need to finish during post-production.
Let’s review a list of steps you can use to build a pre-production process for creating videos for your business.
To start, determine the intention of the video.
Why are you producing this video? What are you looking to get out of it? These are questions you should be asking yourself to help you identify which video type to go with.
Next, create a video production project schedule.
When creating a project schedule, you want to be specific and realistic. This can be as simple or robust as you want. I like to keep things simple by creating a deadline for all tasks in a project and record who’s accountable for each task.
Next, determine your budget to produce the video.
Start by identifying your capabilities and resources. When it comes to budgeting, if you’re just getting started, then it’s possible you’ll incur some upfront costs for equipment and a recording space.
Here’s a pro tip: Once you have the equipment you need and a space to record, make it a best practice to come up with video ideas that can be more easily produced. Maybe it’s a series video for YouTube or maybe it’s an educational how-to video to pair with one of your blog posts. The easier you make it to produce videos, the better. This way you can focus on creating memorable video content as opposed to trying to reinvent the wheel each time you record.
Next, determine where you’re going to distribute your video.
Don’t wait until after you’ve created your video to determine where you’re going to promote and distribute it online. This is because each place you host your video will likely have different requirements, especially when it comes to social media platforms like Instagram, Twitter, Facebook, and so on.
The primary goal for the video we produced was in support of increasing Wild We Wander’s search engine visibility for the term “how to become a digital nomad.” Keeping this in mind, we hosted the video on our YouTube channel, a search engine-friendly channel that generally gets visibility above the #1 text-based search result listing.
If you optimize a YouTube video for a topic you want to be known for and build authority around and it performs well, then you’ll likely be featured high up on a search engine result page.
And to help that YouTube video perform well, we embedded the video near the top of one of our relevant educational website pages as well as various guest blog posts by using the embed code provided by YouTube.
This way we can greet our website visitors with an engaging video that explains what they’re about to learn. And every time someone coming to the page watches that video, it counts as a view on YouTube.
This is the tactic I used to get Wild We Wander’s do-it-yourself truck camper video featured above the #1 text-based search engine result listing, which we also claim.
Here’s the video if you want to check it out and learn more on how to convert your tow vehicle into a functional living space.
Here’s a pro tip: Don’t set your video to autoplay when the page loads. Let the visitor make the decision on whether or not to watch your video. This provides a better experience for the visitor, and it won’t impact the recording of your YouTube view.
And lastly, put your production crew together.
There’s three things to consider here:
If you’re a traveler like my wife, Ariele, and I, then you can accomplish the above with 1-2 people.
Once you’re finished with your pre-production tasks and feel confident about the planning and coordination for creating your video, you’re ready to move on to the scripting stage.
There’s a time and place for videos to be off the cuff and completely unscripted. You have inspiring documentaries, video series rants, and so on.
However, creating a script for your video can be a helpful way to make sure you’re creating meaningful content that your audience will love and remember.
If you skip this step, you’ll find yourself editing more than you need to, releasing a video longer than it should be, and probably losing your audience along the way.
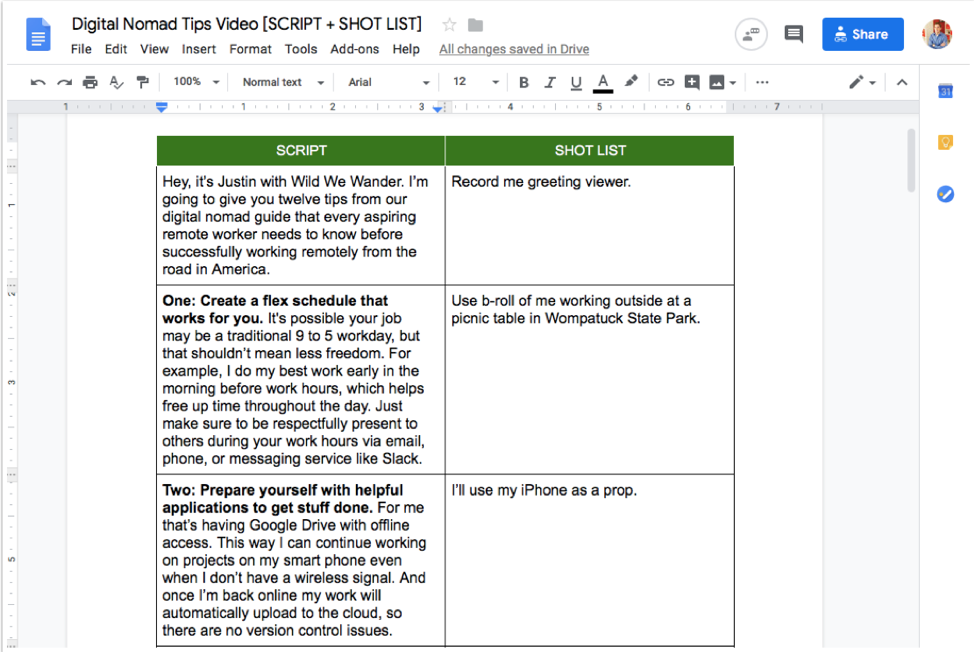
Do all of your drafting in Google Docs to promote collaboration and real-time commenting with collaborators. Use the “Insert > Table” function to adopt one of television’s traditional script writing practices: the two-column script. Write your audio (also known as your script) in the left column and insert matching visual ideas (also known as your shot list) in the right column.
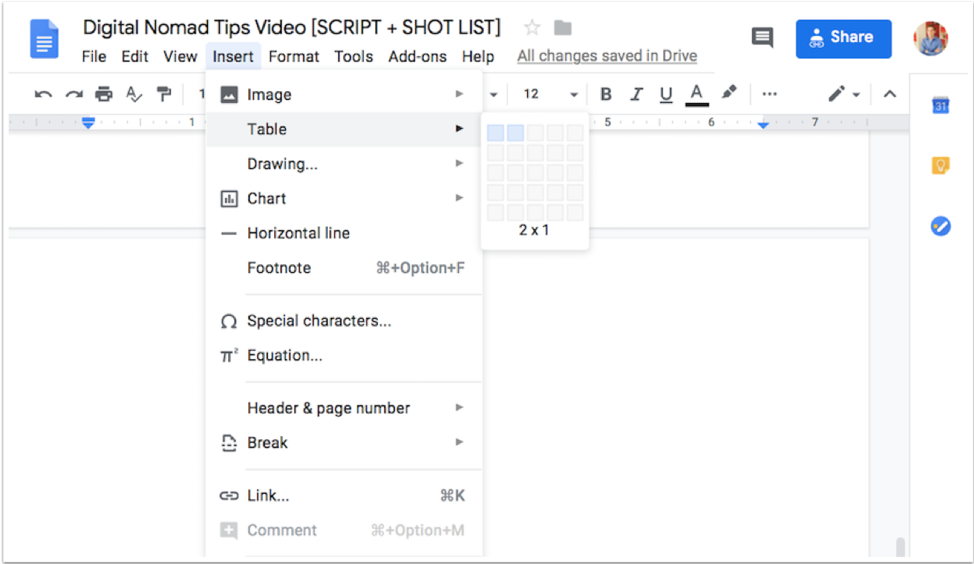
Here’s what script looks like that I created for the digital nomad tips video. Notice how I have a column for my script and a column for the shot list with links to examples.
Below is a list of tips when it comes to scripting your video.
To start, don’t make the viewer wait too long to understand the purpose of the video. You’ll bore them, and they’ll probably leave. Similar to a piece of journalistic writing, include a hook near the beginning that states the purpose of the video.
In the first 10 seconds of my video, I tell them:
Simple, clear, and to the point.
Next, script writing is different from writing a blog post, especially in the language you use.
Video language should be relaxed, clear, and conversational. Avoid using complex sentence structures and eloquent clauses. Instead, connect with your audience by writing in first person and using visual language. Keep the language concise, and avoid jargon and buzzwords.
Here’s a pro tip: Repurpose content from your website or social media to help you create your script. Now I don’t mean copy and paste. Use the content you already have to influence something fresh and new.
For example, tip number one from the digital nomad tips video script, “create a flex schedule that works for you,” was repurposed from this paragraph on our digital nomad page. It’s essentially the same thing, but it’s said from a different perspective and it gets to the point quicker, then moves on.

Next, do a table read.
Words on paper sound a lot different than they do when read out loud.
Here’s a pro tip: Read your script out loud before you start filming. The point of a table read is to smooth out the kinks of the script and nail down inflection points.
Next, end with a call-to-action.
It’s always a good idea to recommend a helpful next step. This way, if the viewer enjoyed what they just watched, they have a recommendation on how to continue consuming your content and engaging with you.
For example, the call-to-action in the digital nomad tips video is to download a copy of our free digital nomad guide. This way, if your dream is to become a digital nomad who lives and works from the road, then we offer a practical resource to help make that a reality for you.

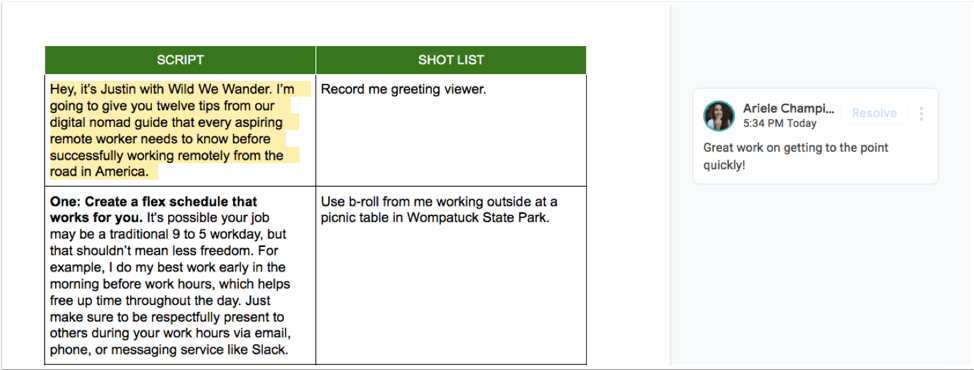
And lastly, get feedback from others.
Send your script to a few people to get feedback. If people are busy and you don’t want to let this step fall to the side, then make sure to get buy-in from a few people during the planning and coordination portion of pre-production. Create a deadline in your production project schedule for them to review your script and provide feedback.
If you use a Google Doc for your script, then you can just have your reviewers highlight text and add a comment where needed.
The Google Doc script I created for the digital nomad tips video I produced was four pages long. But because I repurposed the majority of the content from my website assets, I was able to complete the script and shot list in less than two hours.
Once you have your script and shot list complete for your video, then you can move on to production.
Production is when you create and gather the assets needed to produce the video you scripted during pre-production.
Before recording, you need to determine the equipment and space needed to produce high- quality video content.
Too often the fear and uncertainty of equipment keeps people from creating video content. But learning to shoot video doesn’t have to be overwhelming.
Let’s review the equipment you’ll need first.
To start, you need to have a camera.
It’s likely you have a great, easy-to-use camera right in your pocket: your smartphone. Most smartphones made in the last couple of years are at least capable of shooting high-definition video (or HD for short), with more premium models frequently capable of 4K video shooting. Videos shot in 4K have a very sharp image quality, with a horizontal screen resolution of around 4,000 pixels. For context, 4K video is a picture with about 8.3 million pixels, or about four times as many as a standard HDTV. Either of these options will work if you’re just getting started.
You can produce high-quality videos with your smartphone. For example, here’s a video I created with Jesse using my smartphone and a Rode mic (which you’ll learn more about later in the post), to announce the publishing of my book, Inbound Content. I thought it might be helpful to do a dramatic reading of the content in a Walmart parking lot while living and working from the road in 2018.
In honor of my book #InboundContent publishing today, 🍾🎉 I recorded a reading for you from the road. 🚐💨 You can get a copy of the 📖 here: https://t.co/FI7KycekaK . Have a #contentmarketing question? REPLY below and I'll respond with an answer. #unboundinbounder pic.twitter.com/M3yzERYPTq
— Justin Champion (@JustinRChampion) April 24, 2018
In case you’re interested, this video was my top-viewed non-paid video tweet in 2018 with 2,861 views.
Again, recording with your smartphone is great for filming on the fly or becoming acclimated with video, but at some point you may feel ready to graduate to something more professional: a digital camera that records video.
You may think working with a professional digital camera is intimidating, but really, it’s not. There are four things to keep in mind when it comes to recording professional videos.
The first thing you’ll want to set is your frame rate.
Frame rate is the frequency at which frames in a video sequence are displayed — in this case, frames per second. The most basic customization option when it comes to frame rate is shooting your video at 24 frames per second or 30 frames per second. Frames per second is also known as “fps” or “frames” for short.
Video experts often credit 24 frames with a more “cinematic” look, while 30 frames is more common, especially for videos that need to be projected or broadcasted. For the majority of the video you’ll be creating for you business, I recommend shooting in 30 frames.
Once you’ve set your frame rate in your camera’s settings, it’s time to determine your aperture, shutter speed, and ISO. Be sure to turn your camera to manual mode to control these settings.
We’re going to define each of of these individually, but know that these three variables are meant to work in tandem with each other.
Start with adjusting your shutter speed.
Shutter speed refers to the length of time the camera’s sensor is exposed to light. Think of it as how quickly or slowly the camera blinks.
We won’t go too deep into the science of shutter speed, but to pick the adequate setting for recording, you’ll have to do a little math. First, multiply your frame rate by 2. So if you’re shooting in 30 frames, your shutter speed would be 60.
Next, adjust your aperture.
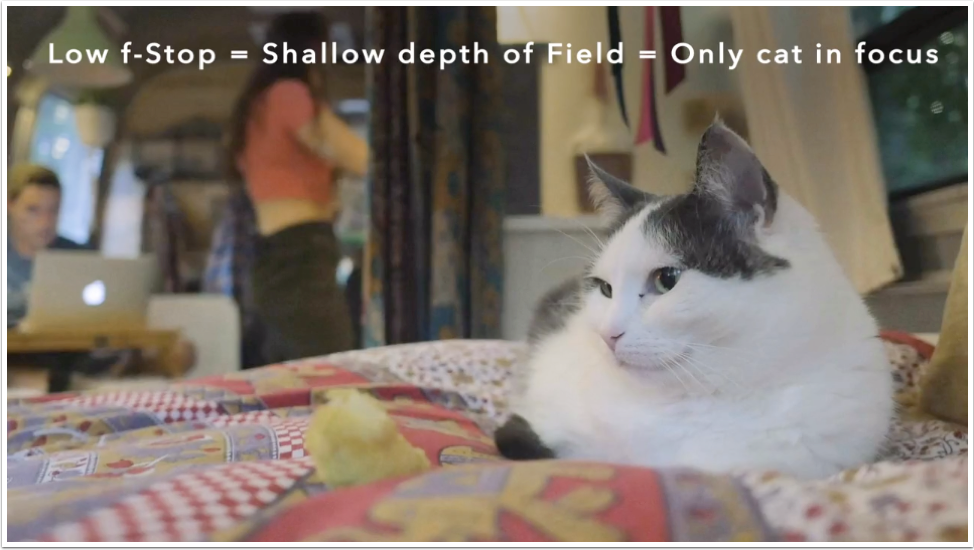
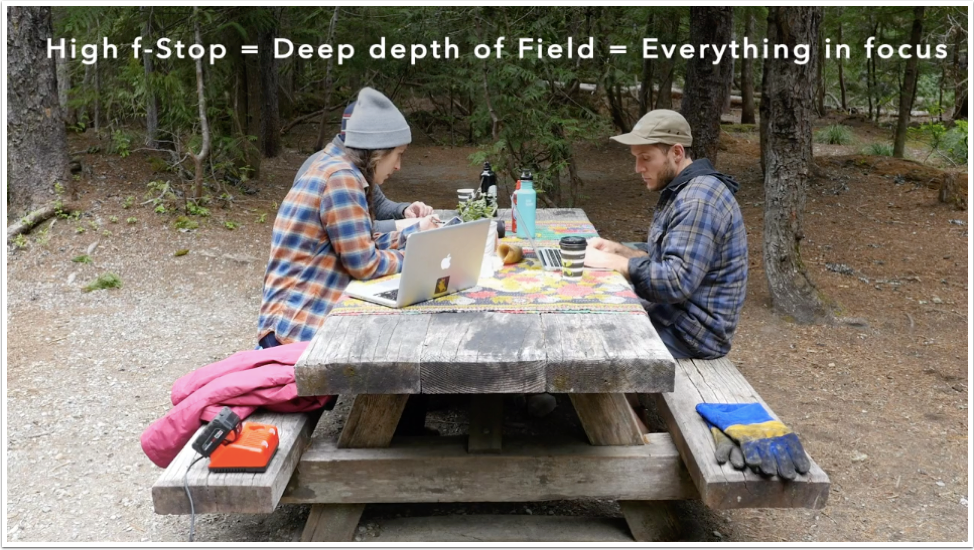
Aperture refers to the size of the opening in the lens. Like a human eye, a lens opens and closes to control the amount of light reaching the sensor. Aperture is measured in what’s called an f-stop. The smaller the f-stop number, the more open the lens is, while a larger number means the lens is more closed.
What does aperture mean for your video? When a lot of light comes into the camera (with a low f-stop number), you get a brighter image and a shallow depth of field. This is great for when you want your subject to stand out against a background.
When less light comes into the camera (with a high f-stop number), you get what’s called deep depth of field and are able to maintain focus across a larger portion of your frame.
Here’s a pro tip: Let as much natural light in as possible by setting the aperture to its lowest setting.
This way, which brings me to my last step, you can adjust your ISO to brighten up your shot.
ISO simply stands for the International Organization of Standardization, which is the main governing body that standardizes sensitivity ratings for camera sensors (among many other things). ISO measures the camera sensor’s sensitivity to light. In settings you’ll see the numbers referred to with numbers in the hundreds or thousands, like 200, 400, 800, and so on.
The higher the number, the more sensitive your camera is to light … the lower the number, the less sensitive. ISO also affects the graininess of the image. Low ISOs produce a crisp shot, while high ISOs create a more noisy, grainy shot.
When choosing an ISO, consider the lighting. If your subject is well-lit (for example, if you were outside or using a lighting system), you can get by with a lower ISO, ideally around 100 or 200. If you’re indoors in a low-light situation, you’ll need to bump up the ISO — just be careful of how grainy it makes your shot. If possible, make it a best practice to keep your ISO below 600. Otherwise your footage will appear grainy.
As a reminder, shutter speed, aperture, and ISO work together in tandem. For example, below is what our camera was adjusted to when recording the digital nomad tips video.
Once you have your camera situation figured out, you’ll want to figure out the rest of the equipment you’ll need to get started.
Let’s review a list of equipment you’ll need to record high-quality video content as well as some best practices on how to set up a space to record.
First, use a tripod to stabilize your camera. It should go without saying, but the handheld method you use for your Instagram story isn’t going to cut it. Tripods will ensure you maintain a steady shot and not break any expensive equipment in the process.
If you need a tripod, then check out this AmazonBasic’s tripod.
Second, get a lighting kit. Light can either make or break the visual experience of your video. You want to make sure your subjects are well-lit with warm lights.
If you need a lighting system, then check out Neewer’s 2-pack basic LED lighting system.
Here’s a pro tip: if you don’t have any lighting equipment available and natural light isn’t an option, then get creative with what you have around you. For example, our Airstream Bambi Sport comes equipped with LED lights spread throughout the interior. Depending on where we record, we can just turn on or off the lights.
Third, record audio with a professional mic. Once you begin testing out your camera’s video capabilities, you’ll notice that it has an internal microphone to record audio… don’t use it.
If you set up your camera at a reasonable distance from your subject, you’ll quickly learn that the internal microphone isn’t powerful enough to adequately record audio. Instead, you should begin investing in a mic, or even a handheld or field audio recorder if you plan to produce higher quality videos regularly.
If you’re just getting started and want a professional mic, then check out this Rode VideoMic.
Here’s a pro tip: Even if you decide to purchase a handheld or field audio recorder, I still recommend investing in something like Rode VideoMic. I recommend this because it’s helpful to have a backup audio solution to pair with your audio recorder.
And fourth, set up your studio.
Now that you have all your equipment, you’re finally ready to build your studio. You can record high quality video even in the smallest of spaces. For example, my studio is inside my 22’ Airstream Bambi Sport (pictured below).

Just make sure the room isn’t too empty. If you have to, bring in items to soften the noise. I like to use blankets and pillows because they’re easily accessible in our Airstream.
Speaking of sound, pay special attention to the noises around you. Find a space with minimal noise or turn down things like a fan during recording. But know that noise is inevitable. For example, and depending on where we’re camping and shooting video, we have to record the same section a few times due to cars and people walking and talking outside our Airstream.
There are some films that are simply beautiful. It’s not the story or even the picturesque setting, but somehow each shot just feels right.
That’s the power of composition. When objects appear where they should in the frame, the quality of your video increases exponentially.
To achieve this in video, consider the rule of thirds — the idea that you can create a sense of balance by imagining the canvas with two horizontal lines and two vertical lines. Key elements should occur at the intersection of these lines.
For example, if you’re recording a how-to educational video, then the subject’s eyes should align with the top horizontal line around one of the two intersections.
Additionally, you can improve your composition by leaving enough headroom at the top of the shot. This is the empty space above the person’s head.
One of the best ways to improve the look of your video is to include b-roll. B-roll is supplemental or alternative footage intercut with the main shot. This might include shots of you giving a tour of your unit or going on an epic hike.
When you’re collecting b-roll, include a variety of shots from varying angles and distances.
Let’s review a sample b-roll series from the digital nomad tips video as an example.
Started with establishing shots. These are wide shots that allow the viewer to see the entire scene. These are great to use when introducing the scene at the beginning of a video.
Next, medium shots. These are tighter shots that focus on the subject or a portion of the scene.
And lastly, close-up shots. These are tightly cropped shots zoomed in to show detail. These might feature someone’s hands typing on a keyboard.
As practice, try telling a story with your b-roll and planning out a shot sequence ahead of time.
Here’s a pro tip to consider: The more you record, the more opportunities you give yourself for b-roll in the future. For example, the b-roll used in the digital nomad tips video was a hodgepodge of footage from other projects I’ve worked on over the years. Some of the footage was shot on a professional digital camera and some of it was shot on my smartphone. Honestly, it’s hard to tell the difference which footage was shot with which device because my smartphone records in 4k.
Before moving on, if you’re unable to include b-roll, then you can use an image still. An image still is just like it sounds — a single static image, as distinguished from a moving image. It’s not as engaging as b-roll, but it can still be useful.
For example, there were a few places we used image stills throughout the digital nomad tips video. And while they weren’t as engaging as the b-roll we included, they helped us cover up a few video edits as well as provided a visual to pair with what I talked about.

Here’s where the final lesson of composition comes in: continuity. Continuity is the process of combining shots into a sequence so that they appear to have happened at the same time and place. A key part of continuity is making sure any ancillary objects in the scene — for example, the letters on this letter board — stay in the same place (and spell the same words) throughout all of the shots.
Once you have an understanding of the equipment and space needed for a high-quality video, it’s time to focus on a key part of your production: Your talent. Let’s talk about getting yourself or your talent ready to record.
No matter if it’s your first video or your hundredth, remember that getting in front of the camera can feel uncomfortable. Schedule plenty of time to practice the script early. You don’t need to memorize anything, just be comfortable with the content.
If you feel natural and can record sections of the content one at a time, then do so. However, if you want a more consistent flow, then consider using your laptop as a teleprompter.
Place a laptop below the eye-line of the camera. Break the script into short paragraphs and record it section by section until you capture a great take of each. If you plan in advance when the final video will show b-roll, you can read those lines directly off the laptop like a voice over.
If you’re not the one on camera, then your job goes beyond pressing record. First and foremost, you need to be a coach. Balance critical feedback with support, and be quick to give encouragement after each take. This is why conducting a table read during the scripting process is so important: It’s easier to give feedback when there’s not a camera in the room. Remember, be a little silly during the shoot, or your talent will be on edge and uncomfortable — and it will show in the footage.
Finally, circle back to the beginning of the script at the end of your recording. Chances are your subject got more comfortable throughout the shoot. Since the beginning is often the most crucial part of the video, record that section again when they’re feeling the most confident.
When it comes to video, some are better at shooting while others are better at editing. Whatever side you’re on, you should understand the process and pain points of each.
For instance, as the person behind the camera, you may believe you collect ample footage and ask all the right interview questions. But to the editor, you may actually be shooting too much of one type of shot and missing out on some that would make their job easier.
Filmmakers teach a valuable lesson here: Shoot for the edit. By remembering that the footage you record will be edited later, you can make smarter decisions and save countless hours in the editing room.
Let’s review a list of techniques you can work on to develop a “shoot for the edit” mindset.
To start, record handles. Handles are buffers at the beginning and the end of each clip you record. Recording handles saves editors from the headache of cutting too close to an important shot.
In the previous section, we discussed how to record your script in short sections. If the editor were to stitch these sections together side-by-side, the subject’s face and hands might abruptly switch between clips. This is called a jump cut, and for editors, it poses an interesting challenge. Thankfully, this is where b-roll comes in handy, to mask these jump cuts.
This brings me to my next tip. As a producer, your job is to capture plenty of b-roll to make sure your editor never runs out. Create a shot list of more b-roll ideas than you think you’ll need and mark them off as you record them.
But let’s say you get into a situation where you don’t have b-roll and you need to mask a jump cut. In this case you can have the editor zoom in or out on the subject being recorded. This will help mask a jump cut and give the illusion of having two cameras.
That’s exactly what we did with the digital nomad tips video. We only had one camera, so we zoomed in and out to mask our jump cuts.
And lastly, mark your good clips. Even if you’re recording a scripted video, you might have to record each section 10 or more times. Once your subject nails the take, wave your hand in front of the lens. That way, the editor can scrub directly to this visual cue and save time on footage review.
Once you’ve captured your video and gathered the rest of your assets during production, you’re ready to move on to post-production. Post-production is where you finish your video and get it out there into the world.
The first thing you want to do after you record is get organized and backup your files.
Yes, file organization is boring. But when you’re editing a lot of potential video footage, it just might save your project.
Capturing video will force you to take a hard look at your computer and file organization habits. If you’re one of those people who work off a cluttered desktop — you know who you are — you’ll find yourself in a world of hurt.
Video files are incredibly large, so it’s very unlikely you’ll want to store any of them on your internal hard drive. You’ll quickly run out of storage, and your computer’s processing speed will begin lagging under the weight.
Instead, invest in an external hard drive with at least a terabyte of storage on it.
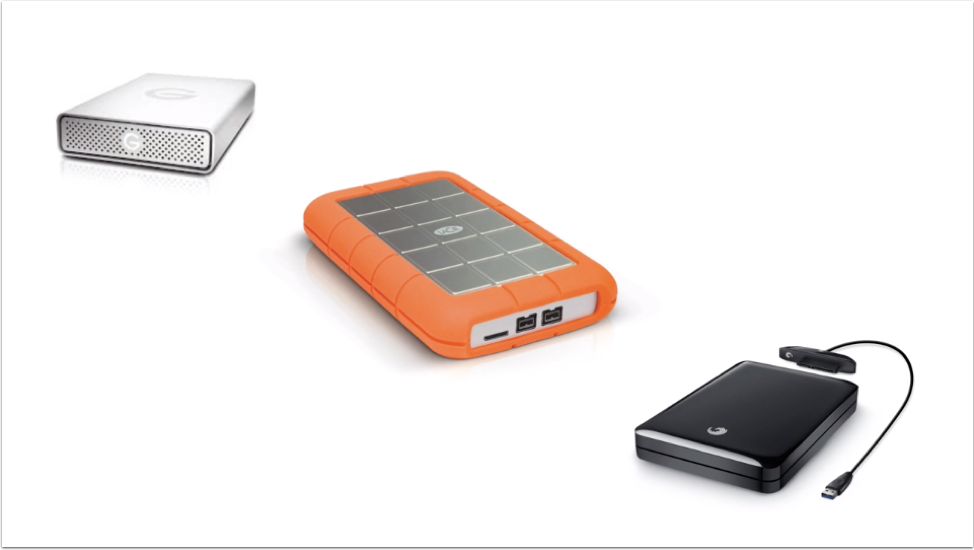
If you’re looking for an external hard drive, then check out this one from Toshiba.
When you import your footage from your camera, place it in the “footage” folder on your hard drive.
For both the project folders and your editing files, follow a consistent naming structure. For example, you could start each name using YRMODA, which stands for: year-month-date. So for example, the digital nomad tips video file is named “190109_digital_nomad_tips_video” because we recorded it on January 9, 2019.
One last thing: Even with a perfectly organized external hard drive, it’s important that you backup your files in the cloud with something like Google Drive.
I get it—video editing can be confusing. It’s easy to feel overwhelmed at first, especially when you see software price tags. Luckily, there are many options for video editing based on your skill level, operating system, and budget. There are even free programs and mobile apps.
If you’re just getting started, then consider iMovie.
iMovie is Apple’s free video editing software. Compatible with Macs and other iOS devices, iMovie is simple, user friendly, and free on all Apple products. With iMovie, you can cut and merge clips and add titles, music, sound effects, basic color correction, filters, and special effects to your video.You’ll also have access to helpful templates that simplify the editing process.
The software supports high-quality clips like 4K video footage and makes it easy to share your work directly to a video hosting platform. Limited access to advanced color correction and editing features mean it isn’t commonly used by professionals, but iMovie is still a great option for beginners.
If you want a step-by-step tutorial on how to make a movie with iMovie, then check out this resource.
If you’re more advanced and want more features, then consider Adobe Premiere Pro, or Premiere for short. Premiere is a leading video editing software program used by amateurs and professionals alike.
The only downside to Premiere is the cost. A year-long subscription to the latest Premiere Pro is a few hundred dollars. If you’re new to video editing, you may want to experiment with a cheaper option like iMovie or Adobe Premiere Elements before investing in Premiere Pro.
No matter which editing software you’re using, when it comes to editing the video, there’s a list of things you can do to simplify your process and make your edit as efficient as possible.
Video editing tip number one: Cut out the mistakes.
Review your footage and find the best take for each clip. In the previous section, I suggested that the person recording wave their hand in front of the lens after the best take. This way, the editor can scrub directly to this visual cue and save time on footage review.
Next, insert media where appropriate to enhance the viewer’s experience.
This could mean adding b-roll, slides, animated text or graphics, and so on. Remember, an effective way to use b-roll and slides is to mask jump cuts. If you find yourself not having b-roll or another form of media to cover up a jump cut, then consider adding a static image or zooming in or out of the shot. This method gives the illusion of having two cameras.
As a nice touch to help the viewer remember which tip we were on in the digital nomad tips video, we added short animated text.
Next, and if needed, add music.
Music is a powerful tool that can alter your video’s tone and your viewer’s mood. Choosing the right music often makes the difference between an amateur project and a professional piece of content. When used properly, it can help keep your viewer’s attention, evoke emotions, and define your overall editing style.
When choosing music, consider your audience and what emotions you wish to evoke. In addition to considering your audience, be sure to contemplate the purpose of the music. Do you need background music or something with real impact? Will you be narrating or speaking in the video? If so, don’t let the music get in the way of your content. Sometimes the best music is the music you don’t remember at all.
Unless you have music you produced yourself, then I recommend looking for royalty-free options from a site like premiumbeat.com. That’s where we purchased the music for the digital nomad tips video.
Before moving on, consider adding intro and outro music. Intro and outro music, or bookends, can serve as a theme for your content. These are a great choice if you don’t need music throughout your entire video. Bookend music can help set the tone for your video, naturally split your content into chapters, and leave your viewers feeling like they had a complete experience.
One last thing: Once your video is truly complete and you’re happy with your edits, you’ll want to export it from the software you used to edit it into an MP4 file. There are other file options, like an MOV file. However, an MP4 is more well received than MOV because the former has more tagging options and is employed in most platforms outside of Mac systems. An MP4 file, also known as an MPEG-4 video file, is a compressed file format that can contain not only video, but also audio and subtitles.
Sharing your creation with the world is the most exciting part of post-production. At this point, you’ve completed your video and exported it from the software where you edited it into an MP4 file. Now it’s time to host and distribute it.
The first video hosting platform that might come to your mind is YouTube. YouTube is the largest video hosting platform, the second largest search engine after Google, and the third most visited website in the world. Every day, people watch over five billion videos on YouTube. It’s also free to upload your videos to YouTube and optimize them for search.
In addition to their massive audience, YouTube offers several other features that make the platform a good option for hosting your video. Because YouTube videos are hosted on individual channels, you can build a dedicated audience of subscribers. Users who follow your channel are more likely to see additional videos you upload.
Within your channel itself, you can also organize videos into playlists, making it easy for your audience to search within your content. As a social platform, viewers can engage with your videos by liking and commenting on them, providing you another chance to interact with your audience. YouTube also offers a variety of advertising options for more sophisticated targeting.
However, these days posting your video to YouTube isn’t enough. You need channel-specific video content for Facebook, Instagram, and Twitter.
Here’s a pro tip: Upload your video file directly to each social media platform if they’ll allow it. This way you’re ensuring optimum visibility of your video content.
And that’s it! Eight steps to creating an effective professional video.
Here’s my last pro tip: Just get started. The first time you do anything is always the hardest. As Mark Twain once said, “The secret of getting ahead is getting started. The secret of getting started is breaking your complex, overwhelming tasks into small manageable tasks, and then starting on the first one.” Use these nine video production steps as a roadmap to help you navigate the next video you create. If you want additional help, then sign up for the free Online Video Marketing Course with HubSpot Academy. There’s a lot of good nuggets in there that can help you develop a video strategy of your own.
Cut!
Want to learn how to incorporate video into your long-term inbound marketing strategy? Enroll to Inbound Strategy Camp's on-demand workshop. It comes with a workbook so you can apply what you're learning to your situation.

Inbound Strategy Camp, designed by Justin Champion, is a free online training kit for those who want to learn how to  for their business.

